Mini Quiche Recipe

Have you ever craved a bite-sized burst of flavor that’s perfect for brunch or a quick snack? That’s exactly what my Mini Quiche delivers every time. These little gems are flaky, custardy, and loaded with your favorite fillings, making them a go-to in my kitchen whenever I host friends or need something easy yet impressive.
I remember the first time I whipped up a batch of Mini Quiche for a weekend gathering—it was a hit! Everyone raved about how these Mini Quiche were so much better than anything from a cafe, and I’ve been perfecting the recipe ever since. If you’re looking for a versatile dish that feels homemade and tastes incredible, you’re in for a treat. Let’s dive into how to make your own Mini Quiche that will have everyone asking for seconds.
In my experience, the beauty of Mini Quiche lies in their portability and endless customization options. Whether you’re a busy parent or just love trying new recipes, this one fits right in. Stick around as I share all the tips and tricks to ensure your Mini Quiche turns out perfectly every time.
Grab This Chef Knife Now - Almost Gone!

- Stays Razor-Sharp: Ice-hardened blade keeps its edge longer than ordinary knives
- Superior Grip Control: Unique finger hole design gives you perfect balance and safety
- Built to Last a Lifetime: Premium stainless steel blade with elegant beech wood handle
- ✓ Finally, a knife that stays sharp and feels comfortable in my hand
- ✓ Professional quality without the premium price tag
- ✓ Makes meal prep faster and more enjoyable
⏰ Only a few items left in stock - order soon
Key Takeaways:
- Mini Quiche are incredibly versatile, perfect for breakfast, brunch, or appetizers with endless filling options.
- This recipe saves time by using a muffin tin for individual portions, ready in under an hour.
- The combination of creamy eggs and sharp cheese creates a rich, savory flavor profile that’s always a crowd-pleaser.
- For the best results, chill the dough before baking to prevent shrinkage.
- Store-baked Mini Quiche in the fridge for up to 3 days or freeze for quick meals later.
Why You’ll Adore This Mini Quiche
Versatile for Any Occasion: Whether it’s a lazy Sunday brunch or a holiday party, these Mini Quiche fit right in. I love how they can be made ahead, saving you stress on the day of. Plus, their small size makes them easy to serve without fuss.
Quick and Effortless Prep: In my kitchen, time is precious, and this Mini Quiche recipe comes together in minutes. You’ll be amazed at how simple it is to pop them into the oven. It’s the kind of dish that feels gourmet but takes no time at all—what’s not to love?
Explosive Flavor in Every Bite: The buttery crust paired with the fluffy egg filling and melty cheese is pure magic. Each Mini Quiche packs a punch of savory goodness that keeps you coming back for more. Trust me, once you try them, they’ll become a staple.
Healthier Homemade Twist: Unlike store-bought versions loaded with preservatives, your homemade Mini Quiche lets you control the ingredients. I always sneak in some veggies for that extra nutrition boost. It’s comforting food done right, and you’ll feel great serving it to your family.
Grab This Kitchen Scale Now — Best Precision Pick!

- Razor-Accurate Every Time: Dual-increment precision down to 0.1g — perfect for baking, meal prep, and portion control with g, oz, ml, and fl'oz modes.
- Smart Removable Bowl Design: Detachable bowl doubles as a protective case for compact storage. Tare function lets you weigh ingredients in any container with zero fuss.
- Built for Everyday Convenience: Auto-zero, tare function, low battery alert, overload indicator, and 2-minute auto-off to extend battery life — all in a sleek stainless steel build.
- ✓ "Perfect for baking — precise, lightweight, and stores easily without wasting counter space"
- ✓ "A game changer! Weighing ingredients is now way more accurate than measuring cups"
- ✓ "Love the 0.1g precision and backlight — best food scale I've owned. Highly recommend!"
⏰ Only a few items left in stock - order soon
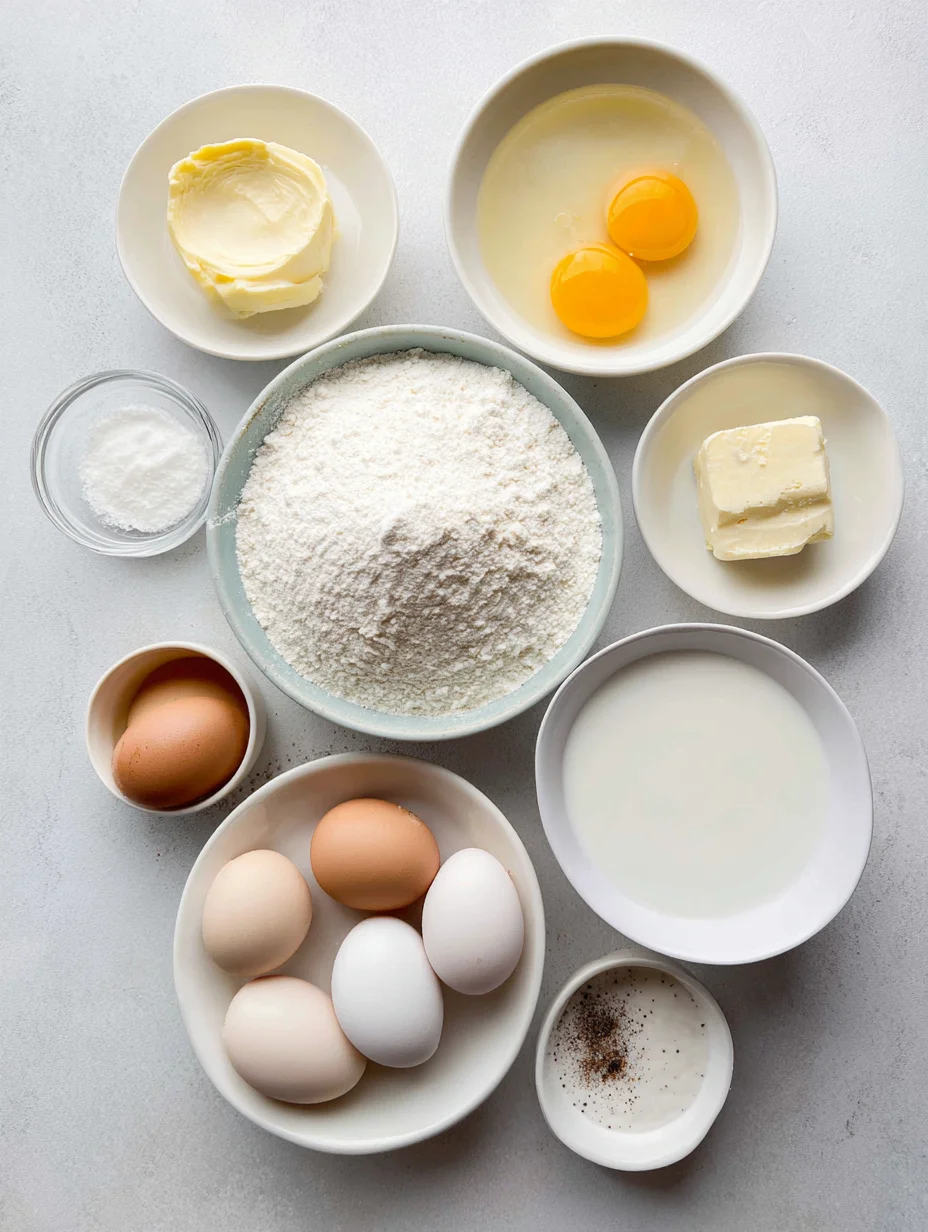
Essential Ingredients for Mini Quiche
Pie Crust Dough: This forms the flaky base that cradles all the delicious fillings in your Mini Quiche. I prefer using a store-bought refrigerated dough for convenience, but homemade adds that extra personal touch if you have the time. It’s essential for that golden, crisp exterior that contrasts beautifully with the soft center, making each bite satisfying.
Eggs: The star of any quiche, eggs create the creamy custard that binds everything together. You’ll need about six large ones for this recipe, whisked with milk for a light texture. In my experience, fresh eggs make the Mini Quiche rise perfectly without any sogginess.
Shredded Cheddar Cheese: Sharp cheddar brings a bold, tangy flavor that elevates the entire Mini Quiche. It melts beautifully, adding gooey pockets of cheesiness throughout. Don’t skimp here—it’s what gives that irresistible pull when you take a bite, and I always grate my own for better melting.
How to Make Mini Quiche
Prepare the Crust and Fillings
Start by preheating your oven to 375°F and greasing a muffin tin— this step ensures your Mini Quiche release easily without sticking. Roll out the pie crust dough on a floured surface and cut circles using a biscuit cutter to fit the tin cups; press them in gently for a snug fit. While that’s happening, chop your veggies like spinach or ham and sprinkle them into each crust along with a handful of cheese—this Mini Quiche base sets the stage for all the flavors to mingle beautifully during baking.
Mix and Pour the Egg Custard
Whisk together the eggs, milk, salt, and pepper in a bowl until smooth and frothy; the key is not overmixing to keep that light texture. Pour the mixture evenly over the fillings in each crust, filling them about three-quarters full to allow for rising. As you do this, you’ll smell the fresh ingredients coming together, and it’s such a rewarding moment knowing your Mini Quiche are about to bake into perfection—bake for 20-25 minutes until the tops are set and golden.
Bake and Cool for Perfection
Once in the oven, keep an eye on them; the edges should turn a lovely golden brown while the centers puff up slightly. After baking, let the Mini Quiche cool in the tin for 5 minutes before transferring to a wire rack—this prevents sogginess and helps them hold their shape. In my experience, cooling allows the flavors to settle, making each Mini Quiche even more delicious when you finally taste one.
Ingredients
- 1 refrigerated pie crust (or homemade dough)
- 6 large eggs
- 1 cup milk (whole or 2% for creaminess)
- 1 cup shredded sharp cheddar cheese
- 1/2 cup chopped spinach or broccoli
- 1/4 cup diced ham or bacon (optional)
- Salt and pepper to taste
- 1 tablespoon chopped green onions for garnish
Mini Quiche Instructions
- Preheat oven to 375°F (190°C) and grease a 12-cup muffin tin.
- Roll out pie crust and cut into 12 circles (about 3 inches diameter); press into muffin cups.
- Sprinkle cheese, veggies, and ham into each crust.
- Whisk eggs, milk, salt, and pepper; pour evenly over fillings.
- Bake for 20-25 minutes until set and golden.
- Cool for 5 minutes, then remove and serve warm.

Pro Tips for the Best Mini Quiche
Blind Bake if Needed: For extra crisp crusts, bake the empty shells for 5 minutes before adding fillings—this prevents sogginess in your Mini Quiche.
Don’t Overfill: Stick to three-quarters full on the egg mixture to avoid spills and ensure even cooking every time.
Experiment with Herbs: Add a pinch of nutmeg or thyme to the custard for a flavor boost that takes your Mini Quiche to the next level.
You Must Know
- Mini Quiche can be fully customized with vegetarian or meaty fillings to suit any diet.
- Using room-temperature eggs helps the custard set more evenly during baking.
- This recipe yields 12 Mini Quiche, perfect for serving 4-6 people as appetizers.
- They’re naturally gluten-free adaptable by swapping the crust for a veggie base.
How to Store Mini Quiche
After cooling completely, store your Mini Quiche in an airtight container in the fridge for up to three days—they reheat beautifully in the microwave or oven. For longer storage, freeze them individually on a tray before transferring to a freezer bag, where they’ll last up to a month. When ready to enjoy, thaw overnight and warm at 350°F for 10 minutes to restore that fresh-baked crispness.
Customizing Your Mini Quiche
Feel free to swap in your favorite veggies like mushrooms or bell peppers, or go meat-free with just cheese and herbs for a lighter Mini Quiche. If you’re watching carbs, try a cauliflower crust alternative—I’ve linked to a great crispy carrot recipe for inspiration on veggie bases. Dairy-free? Use almond milk and vegan cheese to keep the creamy texture intact without compromising flavor.
What to Serve with Mini Quiche
Pair these Mini Quiche with a fresh green salad tossed in vinaigrette for a light brunch— the crisp veggies balance the richness perfectly. For heartier meals, try them alongside roasted potatoes or, if you’re air-frying, check out our air fryer side dish recipes for quick additions. A mimosa or herbal tea rounds it out nicely, making any gathering feel special without much effort.

Mini Quiche Recipe
A mini quiche recipe that uses one basic batter and allows switching out toppings to create an assorted platter pleasing everyone.
Timing
Recipe Details
Ingredients
- 01 2 ½ cups flour ((300g))
- 02 ½ tsp salt ((2.5ml))
- 03 1 cup butter (diced (240g))
- 04 2 egg yolks
- 05 ¼ cup ice water ((60ml))
- 06 8 eggs
- 07 1 cup heavy cream ((240ml))
- 08 salt and pepper (to taste)
- 09 1 tablespoon cornstarch ((7g) for lining pastry shells before filling with custard)
- 10 1 tbsp olive oil ((15ml))
- 11 1 leek (sliced into thin circles)
- 12 2 tablespoons Swiss cheese ((30ml))
- 13 2 tablespoons crumbled goat cheese ((30ml))
- 14 2 tablespoons shredded smoked salmon ((30ml))
- 15 2 tablespoons fresh dill (minced (30ml))
- 16 2 tablespoons feta cheese ((30ml))
- 17 2 tablespoons thawed frozen spinach ((30ml))
- 18 2 tsp fresh Italian parsley ((10ml))
- 19 2 tablespoons mozzarella cheese ((30ml))
- 20 2 cherry tomatoes (sliced into 4-5 wheels each)
- 21 1 tsp pesto ((10ml))
Instructions
Add flour and salt to a food processor and pulse. Then add the butter, a little at a time, pulsing until a coarse meal forms.
Then measure out the water, add ice cubes to it. Then pour this water into another Pyrex pitcher, straining the ice. This will give you very cold water. Add the egg yolks and whisk to combine. Then slowly add the yolk mixture to the food processor pulsing all the while until the dough forms into a ball.
Transfer to a floured surface, press down into a disc and wrap in wax paper. Refrigerate for a minimum of 2 hours, or overnight.
Roll out dough on a floured surface, to ¼ “ (6mm) thickness. Place tins upside down on the dough and cut out a circle about 1 inch (2.5 cm) larger than tin. Fit dough into 4" mini quiche tins with removable bottoms, pressing it down, and then pushing dough past the fluting to rip off naturally. Continue to fit the dough in tins, then trim edges with a sharp knife. Repeat the process until all tins are prepped with the dough. Place tins on a baking sheet and place in the freezer for 15 minutes.
Preheat oven to 350F (175C).
Meanwhile, mix together the egg filling. In a medium-size bowl or a Pyrex, pitcher crack in 8 eggs and beat together. Then add the heavy cream. Season to taste with salt and pepper.
Slice the leeks, white parts only, into circles. Sautee in olive oil until fragrant and crispy. Allow to cool.
Then prepare all the fillings and have everything measured out and ready to go.
Remove Quiche tin from the freezer and sprinkle a little of the cornstarch in the bottom of each pastry shell and brush to distribute with a pastry brush.
For each pastry add the cheese first. On the bottom.
Add the custard to each pastry shell with a Turkey Baster. Allows for excellent filling precision! Only fill ¾ of the way full. Top with the various fillings.
Bake at 350F (175C) for 30 minutes then increase to 375F (190C) and bake for 5-7 minutes until the pastry is golden brown.
Allow to cool slightly. Remove from tins and serve immediately or. Place cooled quiche on a baking sheet, cover loosely with foil. Pop in the fridge. And then reheat when ready to serve at 350F (175C) for 15 minutes.
To serve place quiche across 2 square plates with a little pound of parsley, microgreens or watercress in the center of a plate.
FILED UNDER:
NUTRITION FACTS (PER SERVING)
Nutrition information is calculated using an ingredient database and should be considered an estimate. In cases where multiple ingredient alternatives are given, the first listed is calculated for nutrition. Garnishes and optional ingredients are not included.
Frequently Asked Questions About Mini Quiche
Can I make Mini Quiche ahead of time?
Absolutely, you can assemble them up to 24 hours in advance and bake fresh— just cover the tin and refrigerate. This makes them ideal for busy mornings or parties. I’ve done this for potlucks, and they always turn out just as delicious.
How long does Mini Quiche last in the fridge?
Your baked Mini Quiche will stay fresh in the fridge for 3-4 days when stored properly in an airtight container. Beyond that, freezing is your best bet to avoid waste. Reheat gently to keep the texture intact.
Are Mini Quiche gluten-free?
Traditional ones aren’t, but you can easily make them gluten-free with a GF pie crust or by using sliced zucchini as cups. It’s a simple swap that keeps all the flavor. For more low-carb ideas, explore our site.
Can I freeze uncooked Mini Quiche?
Yes, assemble and freeze them unbaked on a tray, then transfer to a bag for up to two months. Bake straight from frozen, adding a few extra minutes—this Mini Quiche method is perfect for meal prep. It’s one of my favorite time-savers.
What if I don’t have a muffin tin?
No problem—use a mini tart pan or even slice the dough into small rounds on a baking sheet for free-form Mini Quiche. They might bake a bit faster, so watch closely. Creativity makes it fun!
How do I know when Mini Quiche are done baking?
Look for puffed, golden tops and a set center that jiggles slightly in the middle; a knife inserted should come out clean. Overbaking leads to dryness, so err on the side of caution. In my experience, 22 minutes is usually spot-on.
Can I add meat to Mini Quiche?
Definitely—precook bacon or sausage and sprinkle it in for extra protein; it pairs wonderfully with the eggs. Just don’t overload to keep the custard balanced. This Mini Quiche variation is a family favorite.
Is this recipe suitable for vegetarians?
Yes, skip the ham and load up on veggies and cheese for a fully vegetarian Mini Quiche. It’s naturally flexible. For more plant-based inspo, try linking to our spicy red lentil curry.
Final Thoughts
There’s something truly special about pulling a tray of golden Mini Quiche from the oven—the aroma alone makes any day better. Whether you’re a newbie in the kitchen or a seasoned cook, this recipe brings joy and ease to your table. Give these Mini Quiche a try this weekend; I promise you’ll love them as much as I do. Share your twists in the comments below!